

Hi everyone!
I recently posted a little GIF on twitter about a small riso animation I made. I got a lot of questions asking about my process and how I made it.
Riso animation is, in my opinion, an interesting way to make animations, since it takes even more time than normal animation. It just needs a couple extra steps to get that really nice, really real riso texture. I've tried to replicate it digitally, but it's super hard to get the texture moving in the way it moves when you actually riso-print it. It's probably not the most economical or efficient method though, but it's a lót of fun.
I really love combining digital work with old printing methods. It makes it a bit more retro and old-school, which is a big inspiration to my work. So how did I make it?
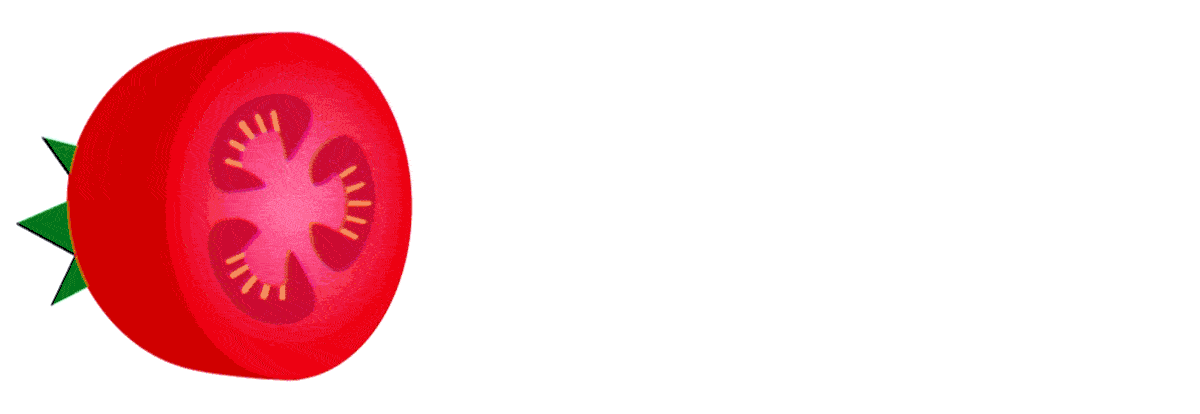
Well, step one is knowing how to animate. I first designed the tomato with vector shapes and then animated it with keyframes in After Effects. I made it with vector shapes, since that is how I make most of my work. But any kind of frame by frame animation works as well. If you know how to animate, you know how to do this step!
I just needed to do one extra step to make the keyframe animation frame by frame, so I could print out all the frames. So I exported the animation as a frame by frame gif. There is an After Effects setting called "JPEG sequence", where you can export your animation frame by frame.

So after all that you now have a bunch of images, wayyyy too much to print! So, I go into the file folder and delete around every 2nd or 3rd image, until there's around 25-30 frames left (depending on your image as well). These images I upload into photoshop by going to 'file -> scripts -> load files into stack' (my photoshop is dutch, but you see the placement of the setting in the image underneath).

And then, just place all your layers in sequence of each other, which is a lot of annoying manual dragging work. You can probably skip these steps if you just design the animation frame by frame from the beginning, however, I really like the extra bounce and transparancy effects After Effects gives me. It just gives me a bit more control and an direct example of what my animation will look like. But if you're a pro at frame by frame animation, go at it!
After the last step, you have the file you can print. From this point on, you need to know how to work with a risoprinter and how to separate color channels in photoshop. I might later on write a whole blogpost dedicated to that as well since it's a lot of technical talk, which doesn't fit in this post alone. But if you know how to risoprint: separate your file into as many colors as you like and go print them.
When you've printed your layers, you're left with this:

Do you see where it's going? Now we just need to put it back together again! It really is a whole process of breaking an animation down and building it up again.
I personally go back into photoshop and just create a layered timeline. I do the manual 'cut and drag' again to put the frames on top of each other and tadaa:
A little riso tomato.
So, it's mainly a lot of work for a small result. I think it's super fun to see the outcome and a nice way to use the riso-printer in a new technique. I'm also a 100% sure there are better ways to do this, but this is the way I know of.
Using these very manual ways to make an animation really brings an animation to life. You could also use lino-print to animate, like a friend of mine did, or etchings!
Important note: If you go on to make some riso-animations, please don't try to replicate my style a 100%! See if you can make it your own! There are also other people using this technique, so try to investigate a little about what is possible.
If you don't know how to riso-print, it's super fun to do and really easy. I recommend it!
If you use this little guide for some cool animations, please subscribe to my blog :) I'll be posting a lot more things very soon on here, also about starting your own freelance company, licensing, pricing and riso-printing.